Exercise 4
- These are the starting images:


The first image is a standard test image.
The second image was artificially produced by someone else ((Lena Blurred and Noisy) http://telin.ugent.be/~frooms/friep/screenshots/), presumably from the first image or one like it.
The goals are to estimate the convolution kernel and use it to deconvolve the second image.
- Open the first image.
- Change color space to YCbCr by clicking CSpace>YCbCr.
- Make only the Y channel active by pressing keypad 5 and 9.
The status should be displayed in the 3rd pane of the status bar.
- Press X to create second layer.
- Open the second image.
- Click Blur/Sharpen>Find Kernel from Blurred and Sharp Images.
- In the following Dialog Box, which automatically apears, make these settings:
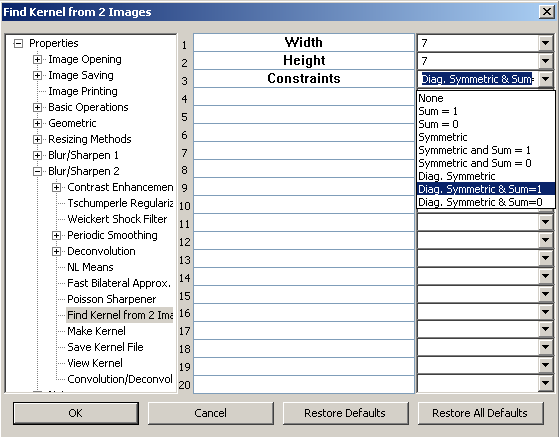
and press OK.
- Click Blur/Sharpen>View Kernel and, in the dialog box, set View Kernel to False and View Singular Value Decomposition (SVD) to True.
After clicking OK, the following should open in Window's Notepad:

Note in row following "7, 1," only the first value is relatively large.
That indicates that we can approximate the kernel to increase the speed of deconvolution.
Close Note Pad.
- Click Blur/Sharpen>Deconvolution by PseudoLAD and make these entries in the dialog box:

- After clicking OK, the image should look like this:

and note the PSNR, 32.190266, shown in the 5th pane of the status bar.
Note that regions of the width of the kernel, in this case 7 pixels, next to the image borders, are ignored in this PSNR calculation, in order to ignore unavoidable artifacts in this region.
- Compare with results published at http://telin.ugent.be/~frooms/friep/screenshots/
For example, to get PSNR of lena512-Gauss-GaussianNoise-RichardsonLucy-TV.png, open this image and leave the first image in the bottom layer.
Click Blur/Sharpen>Deconvolution by PseudoLAD and set the Outer Iterations, on line 12, to 0 which will turn the deconvolution off.
After clicking OK, the PSNR will appear in the status bar.
I get 31.712722 .
- Finished!