These are the starting images:
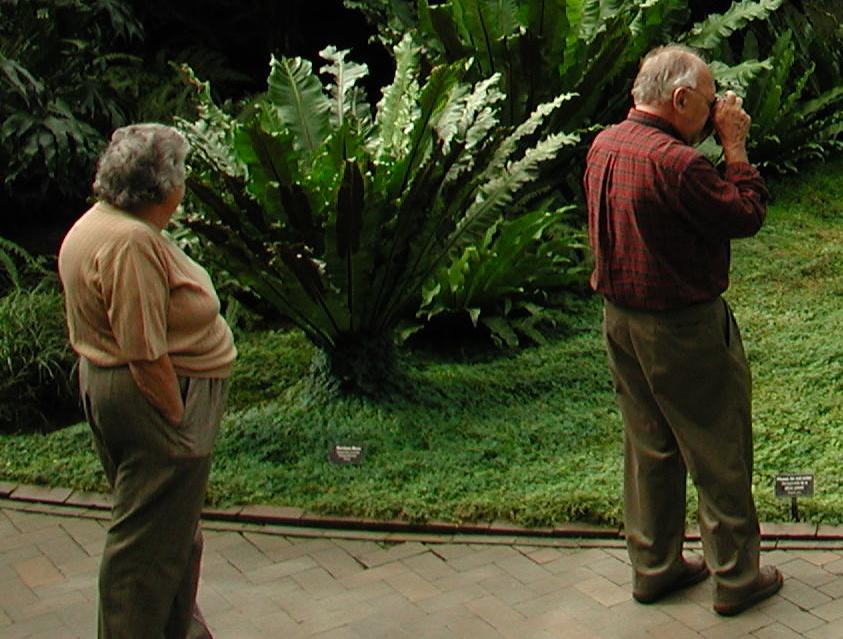
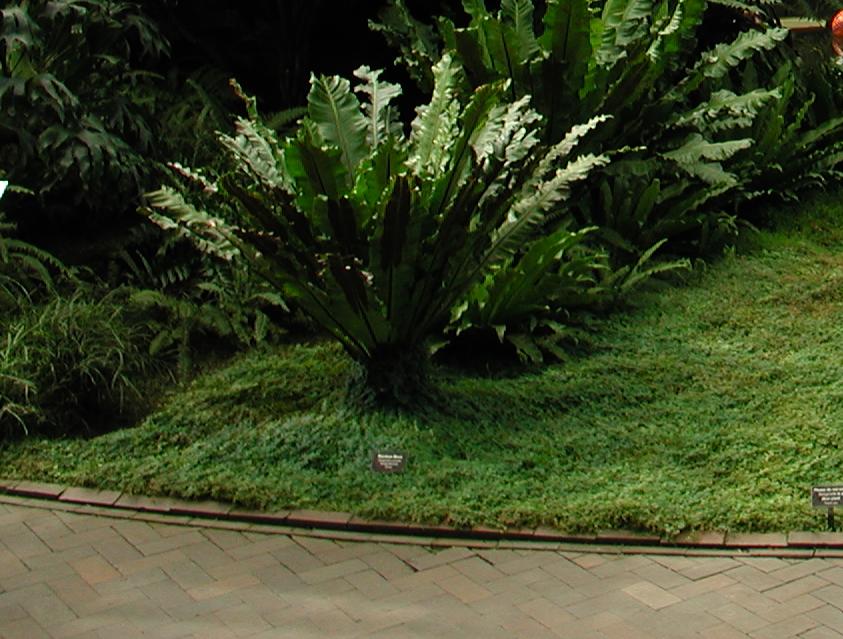
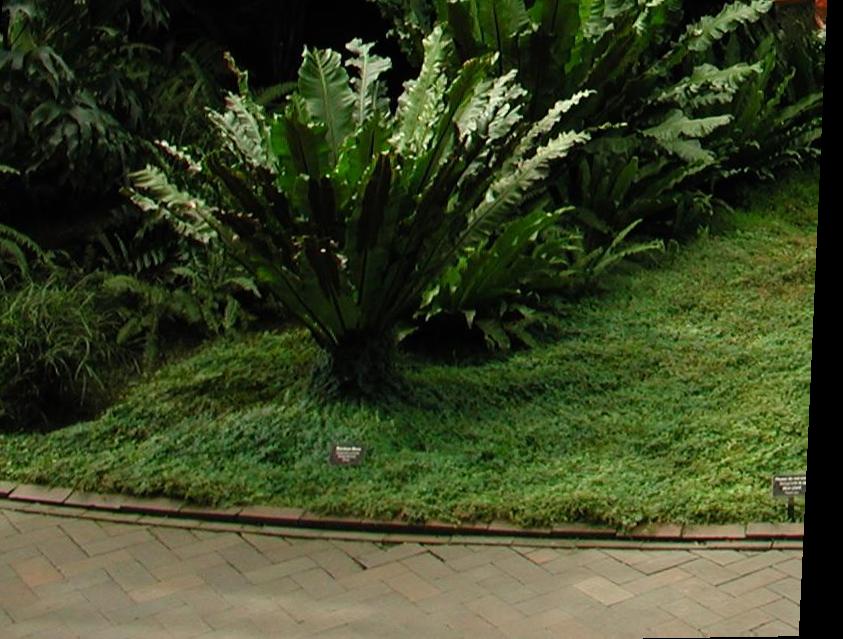
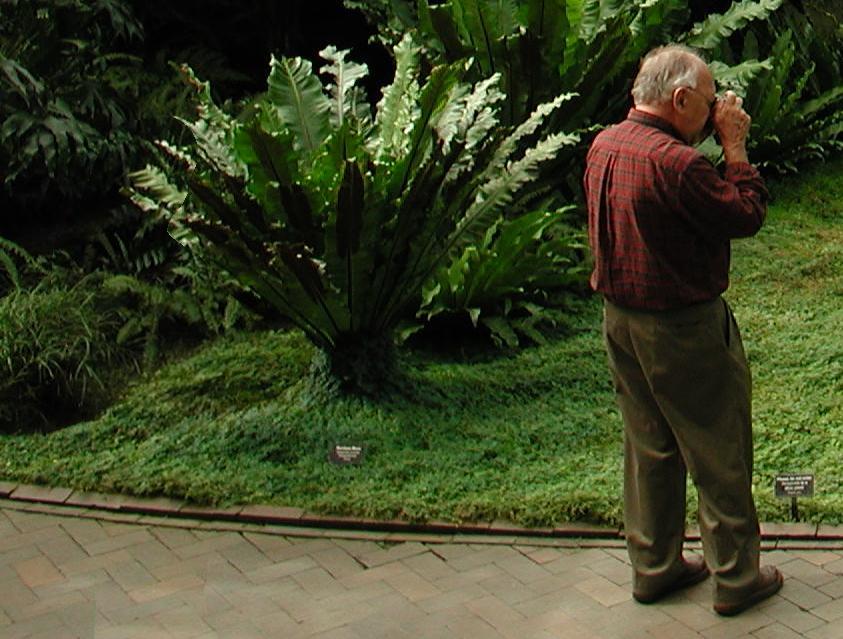
Both are crops from 2048 x 1536 Epson 3100Z photos. These photos were taken half an hour apart at slightly different positions. The object is to remove the woman. A region from the second photo will be used to replace the woman, but it will be necessary to correct for perspective distortions and lighting.
-------------------------------------------------------------------------------
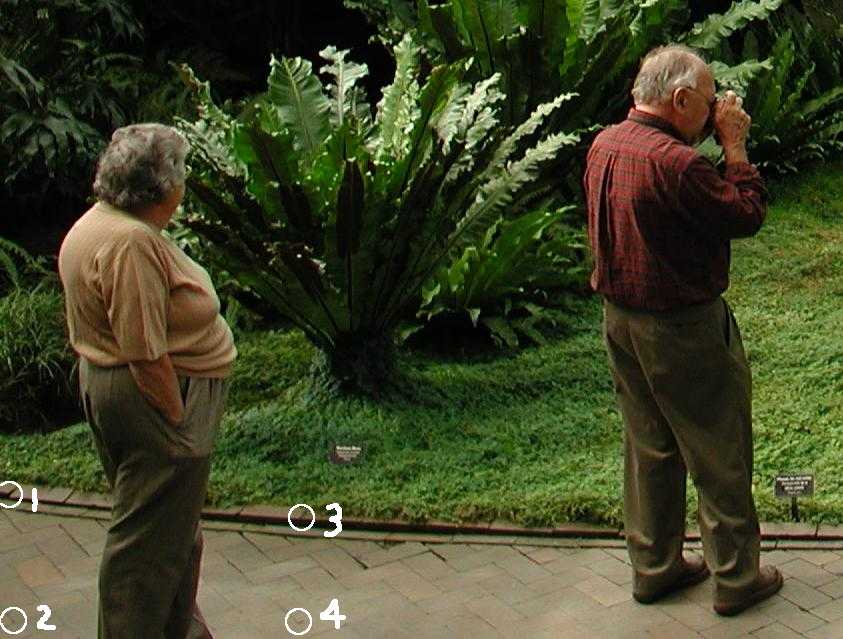
1. Open first image and left click cursor on four tile corners as shown in image. Immediately after each click, press Enter key to place target points in the Queue.
-------------------------------------------------------------------------------
2 a. Press X key. This will create 2nd layer with the new layer on top.
2 b. Open the second image into Layer 2.
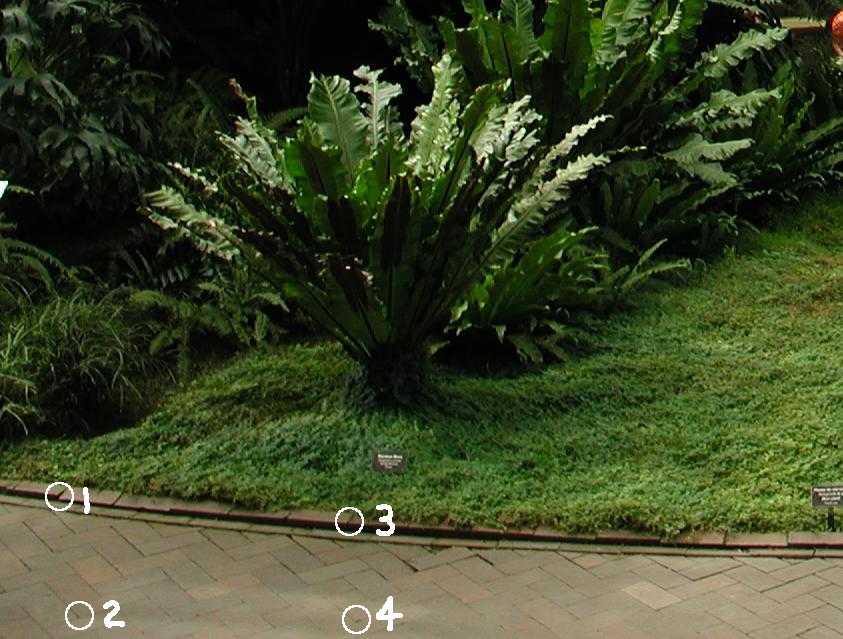
2 c. Click on the corresponding spots in this image, as shown above, but DO NOT press Enter. If you accidentally click on a wrong point, you will have to begin the sequence over.
2 d. Click Geom>"Four Point Registration." If you have not made a mistake, your image should now look like this:
-------------------------------------------------------------------------------
3 a. Press X to bring the first image into the top layer.
3 b. Hold down Ctrl key while clicking Mask(Off)>"Set F2/F3 to Clear/Set Mask."
3 c. Press P to turn on paint mode. You should see "Paint( On)" on the menu bar and the cursor should be circular. (There is a bug under Windows ME and probably 98 and 95 that prevents the cursor display from changing.) Control cursor size with numeric keypad + and - keys.
3 d. Paint an unmasked region over the woman. That should appear black.
3 e. Press Shift+S. That will display the bottom layer through unmasked portions of the top layer. It should look similar to the figure below.
3 f. Click Basic>"Set F2/F3 to Multiply/Divide by Constant."
3 g. Press X to bring up the second image. Adjust the brightness by pressing F2 and F3 so that when you inspect the first image (by pressing X), the border of the masked region is least noticeable.
3 h. Bring the first image to the top. It should look very much like this:
Notice that you can still see mask borders on brick sidewalk.
-------------------------------------------------------------------------------
4 a. Press < > keys to scroll F2 programmed operations (shown as last item in menu bar) back to "Clear/SetMask."
4 b. With a small cursor, try to extend visible portions of the mask border so that the new border portions are invisible.
4 c. Turn off the unmask display by pressing S key.
4 d. Copy bottom layer to unmasked region by pressing = key. Finished!

-------------------------------------------------------------------------------